
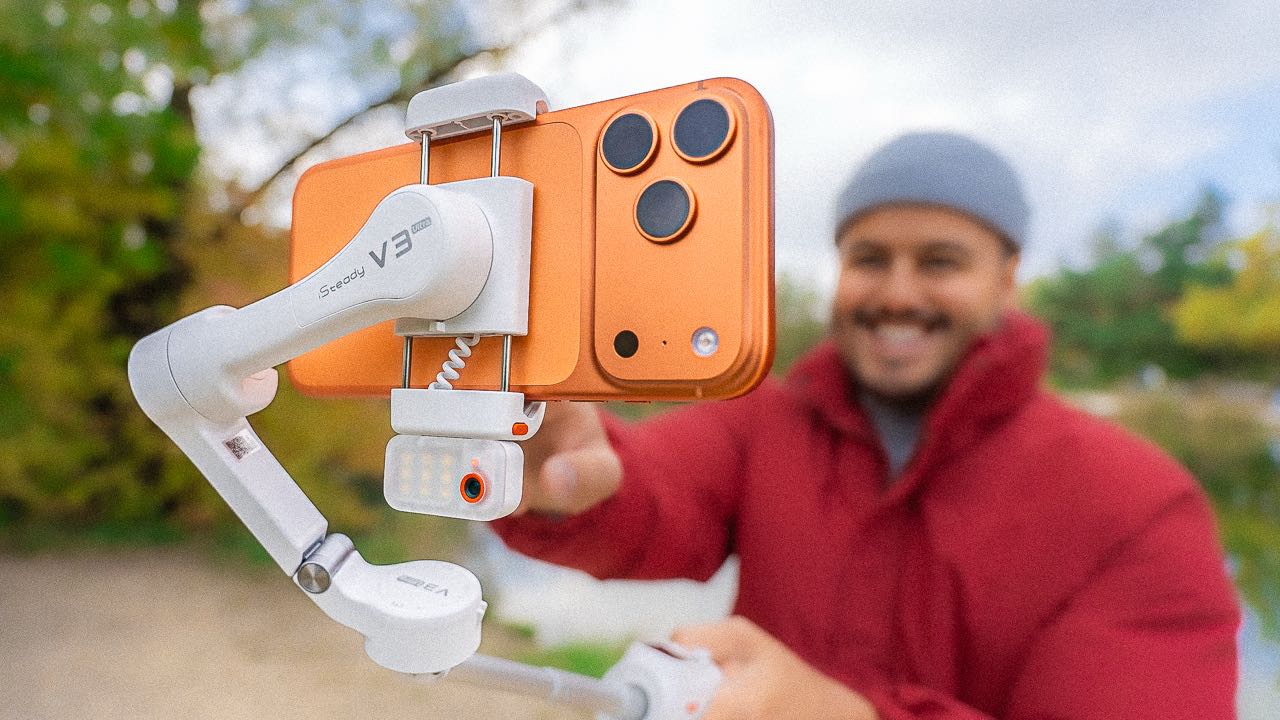
Most guides about choosing a gimbal for iPhone focus on which model to buy. But once you actually have one in your hands, the bigger challenge is setting it up properly and learning how to get smooth, stable footage consistently. From balancing your phone correctly to understanding shooting modes and movement techniques, a good setup makes a noticeable difference in the final video quality.
This guide is written specifically for iPhone Pro Max users, since larger models like the iPhone 15, 16, and 17 Pro Max are heavier than standard smartphones. That extra weight can affect balancing, motor performance, and overall stabilisation, especially on smaller or lower-powered gimbals.
Why iPhone Pro Max Users Need a Gimbal Built for Heavier Phones
Smartphone gimbals are not all built equal when it comes to payload. An iPhone 17 Pro Max with a protective case and a clip-on anamorphic lens can push 300–320 g. Add a wide-angle adapter and you're approaching 350 g.
Entry-level gimbals in the $80–$120 range are typically rated for 260–280 g. That's not a safety margin: that's over-limit. The motors will still spin, but you'll see micro-jitter, faster battery drain, and motor whine as the gimbal fights to compensate for weight it wasn't designed to hold.
The Hohem iSteady M7 big phone gimbal has a 400 g payload rating. That headroom means the motors are running comfortably at 75–80% capacity with a loaded Pro Max, rather than straining at or beyond their limit. Comfortable motors mean smoother footage, longer battery life, and a longer lifespan for the gimbal itself.
If you're shooting with the native Camera app's ProRes or 4K 60fps mode, the phone's processor also generates more heat than budget configurations, which can affect battery draw at the gimbal's charging port during extended shoots. A gimbal with pass-through charging on a stronger motor platform handles this considerably better.
First-Time Setup: Unboxing to First Shot in 10 Minutes
1. Unfolding and Powering On
Unfold the gimbal arm from its transport position. Most Hohem phone gimbals have a locking mechanism or fold-lock on the axis arms: release these before powering on to avoid motor strain. Hold the power button for two seconds until the indicator light confirms the gimbal is active.
2. Mounting the iPhone
Extend the phone clamp to slightly wider than your iPhone. Slide the phone in horizontally and center it in the clamp before tightening. Centering is not cosmetic: an off-center phone shifts the centre of gravity and forces the motors to compensate continuously.
If you're using a case, mount the phone with the case on. You'll need to rebalance if you remove the case later.
3. First Balance Check
Power off the gimbal. Hold the tilt axis arm horizontally and release it. A properly balanced phone will hold the position without drifting. If it tilts forward or back, slide the phone clamp forward or back in the mount until it holds level. Repeat the check for roll balance by tilting the gimbal 90 degrees.
Don't skip this step. A misbalanced phone forces the motors to run continuously at elevated power output just to maintain position, which drains the battery and reduces stabilization accuracy.
4. Pairing With the Hohem Joy App
Download the Hohem Joy app from the App Store. Open it and select your gimbal model from the connection screen. The app connects via Bluetooth. Once paired, you'll have access to AI tracking, shooting modes, time-lapse controls, and firmware update notifications: all unavailable through the hardware controls alone.
The 5 Shooting Modes Every iPhone Gimbal User Should Know
Pan Follow
In Pan Follow mode, the gimbal follows your left and right movement while keeping the tilt and roll axes locked for a steadier horizon. It’s one of the easiest modes to use and works well when you want smooth directional movement without too much camera motion.
Best for:
- Walking or travel shots
- Following a subject moving across the frame
- Simple vlog-style movement shots
Pan and Tilt Follow
This mode allows both the pan and tilt axes to respond to your movement, making the camera feel more natural and responsive while still smoothing out smaller shakes and sudden movements. For many creators, this becomes the default mode for everyday filming.
Best for:
- General handheld filming
- Lifestyle and behind-the-scenes content
- Filming subjects at different heights or angles
All Lock
All Lock mode keeps the camera pointed in the same direction regardless of how the handle moves. Instead of following your wrist movement, the gimbal maintains a fixed framing position for more controlled-looking shots.
Best for:
- Orbit or tracking shots
- Moving around a stationary subject
- Keeping framing consistent during movement
POV / Inception
POV or Inception mode unlocks the roll axis, allowing the camera to rotate for a more dramatic spinning effect. Since the movement is very stylised, it’s usually best used selectively rather than throughout an entire video.
Best for:
- Music videos and cinematic edits
- Transition shots
- Creative social media content
Sport Mode
Sport Mode increases the gimbal’s response speed so it can react faster to sudden movement and direction changes. The motion feels more aggressive and responsive, making it better suited for faster-paced shooting situations.
Best for:
- Sports and action clips
- Skateboarding or cycling footage
- Fast-moving subjects or pets

Filming Vertical vs Horizontal With an iPhone Gimbal
The majority of modern content consumption happens in portrait orientation. TikTok, Instagram Reels, and YouTube Shorts are all vertical-first. Most Hohem phone gimbals support a quick-switch between landscape and portrait without rebalancing, using either a physical rotation lever or a one-button portrait mode.
For a TikTok or Reels workflow: set the gimbal to portrait orientation, pair with the Hohem Joy app for vertical-mode AI tracking, and shoot natively vertical. Avoid shooting horizontal and cropping: you lose resolution and the framing is never as clean.
When switching modes mid-shoot, pause recording, switch orientation, check that the gimbal has recalibrated to the new axis, and resume. Some Hohem models switch automatically and recalibrate in under two seconds.
7 Pro Shooting Techniques for iPhone Creators
1. Walking Shot
Bend your knees slightly and walk with a fluid gait, absorbing vertical movement through your legs rather than your wrist. The gimbal handles residual shake, but the smoother your body movement, the better the result.
2. Reveal Shot
Start behind an object: a door frame, a wall, a tree: and slowly walk around it to reveal the subject. In Pan Follow mode, the camera rotates to stay on the subject as you complete the arc. One of the most visually compelling moves available with a handheld gimbal.
3. Low-Angle Tracking
Lower the gimbal to knee or hip height and walk toward the subject. This angle, combined with smooth stabilization, creates a cinematic quality associated with professional film production. The key is keeping your body low and your walk even.
4. Time-Lapse / Hyperlapse With Mini Tripod
Mount the gimbal on a mini tripod, lock all axes, and use the Hohem Joy app's time-lapse mode. This approach produces a far cleaner time-lapse than the iPhone's native mode because the gimbal absorbs vibration and micro-movement across the recording period.
5. AI Subject Tracking
In the Hohem Joy app, activate AI tracking and tap your subject on the preview screen. The gimbal's motors will follow the subject as they move within the frame. Most useful for solo creators filming without an operator, fitness instructors, tutorial videos, and pet photography.
6. Vertical Reels With Quick Switch
Switch to portrait mode, enable AI tracking, and step back from the mounted gimbal. The combination of a stable, tracked vertical frame is the production setup behind most high-quality solo creator content on Instagram and TikTok.
7. Cinematic Mode + Gimbal Stabilisation Stacked
iPhone 13 and later models include Apple's Cinematic mode, which applies a shallow depth-of-field effect and subject focus tracking in video. Stack this with the gimbal's physical stabilization for footage that looks genuinely cinematic: smooth motion, blurred backgrounds, and sharp subject focus simultaneously.

How to Balance a Gimbal for iPhone (Step by Step)
Why Balancing Matters
An unbalanced gimbal works harder. The motors compensate for gravitational pull instead of directing all their output toward stabilizing movement. The practical effects: reduced battery life, increased motor heat, and less accurate stabilization. Balancing takes two to three minutes and pays back those minutes in every shoot you do afterward.
Balance the Tilt Axis
Power off the gimbal. Position the tilt axis arm horizontally (camera pointing forward). Release the axis and let it settle. If the camera dips forward, slide the phone clamp backward in its mount. If it dips back, slide it forward. The axis is balanced when it holds position without drifting.
Balance the Roll Axis
Next, rotate the gimbal so the camera is pointing straight down. Release it and watch how it settles. If it leans to the left or right, shift the phone slightly sideways in the clamp until it stays level without tilting.
Balance the Pan Axis
Hold the gimbal upright and let the arm swing naturally. It should settle facing forward without turning to either side. If it consistently drifts left or right, make small adjustments using the pan lock or balancing screw until it stays centred on its own.
Re-Balance When Switching Between Landscape and Portrait
Changing between horizontal and vertical shooting shifts the phone’s weight distribution, so a setup that’s balanced in one orientation won’t necessarily stay balanced in the other. If you switch orientation for a shoot, take a moment to recheck the tilt and roll balance before you start recording.
Common Problems and Fixes
Gimbal Drifting / Not Holding Position
Most drifting issues usually come down to either an unbalanced setup or a gyroscope that needs recalibration. Start by rebalancing the phone, since that’s the most common cause. If the issue continues after that, it’s likely a calibration problem.
What to do:
Open the Hohem Joy app and run the gyroscope calibration on a completely flat, stable surface. Avoid moving the gimbal during calibration, as even small shifts can affect accuracy.
AI Tracker Losing the Subject
AI tracking works best when the subject stands out clearly from the background and lighting is consistent. In darker environments or busy scenes, the system may struggle to maintain lock on the subject.
What to do:
Try lowering the tracking speed in the app settings for smoother, more stable tracking. If your subject is mostly framed from the waist up, switching to face-only tracking can also improve reliability.
Phone Feels Off-Centre
If the phone looks slightly shifted in the clamp after mounting, the balance point may no longer be aligned. This usually happens when the clamp has been adjusted or bumped after setup.
What to do:
Loosen the clamp, re-centre the phone by eye, then tighten it again. After that, quickly recheck the tilt and roll balance before you start filming.
FAQ
Will my gimbal work with the iPhone 17 Pro Max?
The Hohem iSteady M7 big phone gimbal supports phones up to 400 g. The iPhone 17 Pro Max is within that range. For other Hohem models, check the payload specification against your phone's weight with its case before buying. See Hohem's iPhone 17 Pro compatibility guide for model-specific details.
Do I need to rebalance every time I add a case?
Yes. A case typically adds 30–60 g and changes the centre of gravity. Mount the phone with the case you plan to use for that shoot and balance from that configuration.
Can I use a gimbal for iPhone with MagSafe accessories?
MagSafe accessories attached to the back of the phone change its weight and balance. Mount the phone with all planned accessories attached, then balance. Removing MagSafe accessories mid-shoot will require re-balancing.
Does the Hohem M7 work with the native iPhone camera app?
Yes. The M7's hardware controls: shutter button, zoom, and mode switch: interface with the native Camera app via Bluetooth. The Hohem Joy app is optional, not required, though it unlocks AI tracking, advanced modes, and time-lapse controls that the native app doesn't offer through the gimbal.
What's the best gimbal for iPhone Pro Max specifically?
For iPhone Pro Max users who shoot with cases and lens accessories, a gimbal with a 400 g or higher payload rating is the correct specification. The M7 was designed with this weight class in mind. For lighter iPhone models without accessories, mid-range Hohem options cover the payload requirement comfortably.
Start Filming
The difference between a well-set-up gimbal and a poorly balanced one is visible in the first 10 seconds of footage. Follow the setup and balancing steps above, pick the right shooting mode for each situation, and the iPhone Pro Max + gimbal combination produces results that rival dedicated camera setups. Browse Hohem's mobile gimbal stabilizers collection, or go straight to the Hohem iSteady M7 big phone gimbal if you're shooting with a Pro Max. For more on choosing between models, see our best gimbal for iPhone buyer's guide.
Commenta
Nota che i commenti devono essere approvati prima di essere pubblicati.
Questo sito è protetto da hCaptcha e applica le Norme sulla privacy e i Termini di servizio di hCaptcha.