How to Shoot Cinematic B-Roll on Your Phone: 10 Shots Every Creator Should Know
B-roll footage is the footage that keeps a video together. It's the cutaway used to bridge a jump cut, the establishing shot that opens a scene, and the visual space that helps keep people on the page instead of scrolling. Having good B-roll transforms a simple talking-head video into a produced and purposeful video.
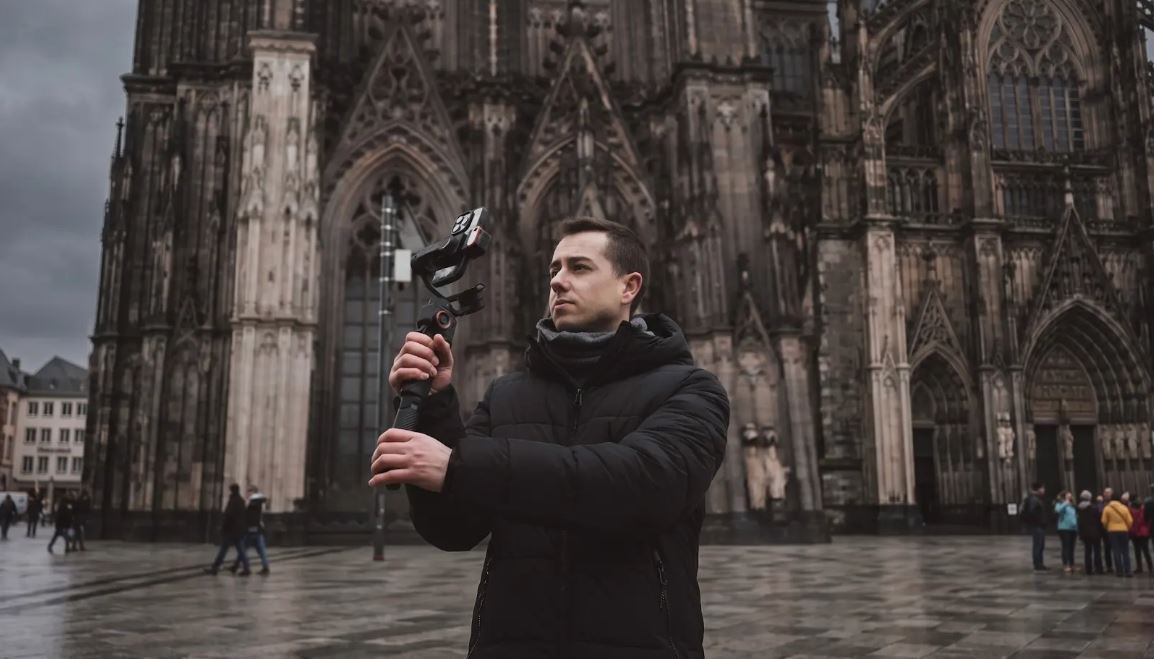
The key to amateur B-roll versus cinematic B-roll is almost always in the movements. Shaky hand-held clips are filler. Smooth and slow camera movements are like storytelling. A gimbal stabilizer is that missing link: it lets you hold your phone and produce professional-quality photos.
This guide will explain 10 shots that you can begin using right away (specific gimbal settings and uses for each shot). No need for any film school.
The 10 Cinematic B-Roll Shots and How to Execute Them
1. The Reveal Shot
Place your camera behind an object such as a wall, doorframe, tree, shelf, etc. Then push the gimbal forward smoothly and gently until the subject or the scene is in the frame. The audience is given a visual shock when the element is shown.
Gimbal setting: Follow mode with slow motor speed. This keeps the tilt and pan responsive to your forward movement while maintaining a controlled, cinematic pace. Avoid fast motor speed here; the reveal loses its impact if the camera rushes forward.
Best used for: Travel content (revealing a landmark for the first time), restaurant and food vlogs (pushing through a doorway into a dining space), real estate and architecture walkthroughs, and product reveals where you want to build anticipation.
Pro tip: keep your walking pace deliberately slow. Most beginners push too fast, which makes the reveal feel rushed. Count to three with each step and let the shot breathe.
2. The Walk-and-Talk
This is the core of vlogging and social content. Subject walking toward the camera, with the camera or directly at the camera while speaking. The gimbal moves with them and creates a natural and interesting tracking shot.
Gimbal setting: Pan-follow mode. This locks the tilt axis so the camera maintains a consistent height while allowing the pan axis to follow horizontal movement. It prevents the up-and-down bobbing that makes walk-and-talk footage feel amateurish.
The most common mistake here is walking too fast. Your natural walking speed creates more bounce than you realize. Slow down to about 70% of your normal pace, and the gimbal's motors can absorb the remaining motion smoothly. If you need to cover ground quickly, speed up the footage slightly in editing rather than rushing the actual shot.
Best used for: Vlogs, behind-the-scenes content, guided tours, and any format where the creator speaks directly to the camera while moving.
3. The Orbit (Arc) Shot
Slowly circulate around a stationary object while maintaining the camera focus on the object. The subject remains in the frame, and the background rotates around. The resulting video is dramatic and three-dimensional, and gives any video instant production value.
Gimbal setting: Lock tilt, free pan. You want the camera to stay level (no vertical movement) while the pan axis tracks your circular movement around the subject. Keep your distance consistent by imagining you are walking along the edge of an invisible circle.
Best used for: Product showcases (orbiting around a table display), portrait-style creator intros, landscape reveals at scenic viewpoints, and any scene where you want to add visual depth to a static subject.
4. The Low Angle Push
Keep the gimbal at waist height or lower and move forward to your subject. The low angle conveys a sense of scale and drama that eye-level shots would not be able to capture. The subject matter seems bigger and more imposing, and the settings seem more immersive.
Gimbal setting: Follow mode. Let both the pan and tilt axes respond naturally to your forward movement. If the gimbal has an extension pole (like the M7's built-in 193mm pole), extend it downward to get even lower without crouching uncomfortably.
Best used for: Urban and street photography, architecture content, sports and fitness footage, and any scene where you want the subject or environment to feel powerful and commanding.
5. The Dutch Tilt
The Dutch tilt is a conscious movement of the camera, making use of a diagonal horizontal line. It can create tension and a sense of style and edge to a shot. It can be used sparingly to accentuate certain moments in an edit.
Gimbal setting: Lock mode on pan and tilt, then manually rotate the gimbal's roll axis to your desired angle. On most Hohem gimbals, you can lock the roll axis at a specific position so the angle stays consistent throughout the shot. A 15 to 30 degree tilt is the sweet spot for most content.
Use this shot with intention. One or two Dutch tilts in a video add style. Overusing it makes the entire edit feel disorienting.
Best used for: Music video aesthetics, stylized transitions between scenes, dramatic B-roll for storytelling content, and creative social media clips where visual energy matters.
6. The Overhead (Top-Down) Shot
Align the Gimbal to point down and sweep horizontally across the object that is below. This gives a flat-lay product shot, recipe preparations, craft, art, and urban patterns from balconies or higher vantage points.
Gimbal setting: Lock mode on all axes. You want the camera to point straight down without any correction from the motors. If your gimbal has an extension pole, extend it fully to gain additional height. The M7's built-in pole is particularly useful here because it gives you reach without needing a separate accessory.
Best used for: Food content (plating, pouring, cooking process shots), product flat-lays, desk setup reveals, crafting and unboxing content, and geometric urban patterns shot from above.
7. The Parallax Pan
Move the camera side to side (left and right) but not up and down or in and out of the frame. The foreground and background move at different speeds, lending depth and dimension to a shot that otherwise would be flat and static. This is one of the easiest gimbal shots to perform and is one of the most visually compelling ones.
Gimbal setting: Pan-follow mode. Move slowly and steadily in a straight line. The slower you move, the more cinematic the parallax effect feels. Place an object in the foreground (a plant, a railing, a window frame) to amplify the depth separation.
Best used for: Establishing shots for any location, product display footage, real estate walkthroughs, and B-roll transitions between scenes.
8. The Jib-Style Rise
Begin with the gimbal low and slowly ascend to have the subject remain in frame. This is similar to the movement of a professional jib crane, producing a rising reveal which will give a level of scale and grandeur to a scene. The camera eye moves upward over the viewer, which gives the viewer a sense of openness.
Gimbal setting: Follow mode with slow motor speed. Start with the gimbal near waist height and raise it above your head in one smooth motion. Bend your knees at the start and gradually straighten up as you lift. This body movement helps create a more even, controlled rise than using your arms alone.
Best used for: Opening shots for any video, revealing a landscape or cityscape, transitional B-roll between segments, and dramatic scene-setting moments.
9. The Tracking Follow
Walk or jog with a moving object, keeping it in the frame. The camera follows them, adding a sense of dynamism and purpose. This is the shot that makes it look like it's a movie.
Gimbal setting: Follow mode with AI tracking activated. With AI tracking on, the gimbal automatically adjusts pan and tilt to keep the subject centered, even if they change speed or direction. This frees you to focus on your own movement and footing rather than manually aiming the camera.
If you are filming a runner, cyclist, or fast-moving subject, switch to sport or vortex mode for a more aggressive motor response. Standard follow mode may not keep up with rapid direction changes.
Best used for: Fitness and sports content, behind-the-scenes fashion shoots, event coverage, and any scene where the subject is in motion, and you need to keep pace.
10. The Slow Pullback
Focus closely on the subject (the face, the product, the detail) and take a step back and look at the subject by keeping the camera on the subject. The frame expands as they are able to see more of the environment and context in which the subject exists. It's one of the most impactful shots in any creator's arsenal.
Gimbal setting: Lock mode. You want the camera to stay pointed at the exact same spot while your physical movement creates the pullback. Any correction from the motors will disrupt the smooth, intentional feel. Walk backward slowly and steadily. Check your path before starting the shot so you do not trip or bump into anything.
Best used for: Closing shots and outros, emotional story beats, transitions from detail to wide context, and any moment where you want the viewer to feel a sense of distance or perspective shift.
Gimbal Settings Quick Reference for B-Roll Shots
Here is a simplified reference for which gimbal mode to use across different shot types:
|
Mode |
What It Does |
Best For |
|
Follow |
Pan and tilt follow your movement |
Tracking, reveals, jib rise, low angle push |
|
Pan-Follow |
Pan follows movement, tilt stays locked |
Walk-and-talk, parallax pan, orbit shots |
|
Lock |
All axes locked in position |
Slow pullback, overhead, Dutch tilt |
|
Sport / Vortex |
Fast motor response on all axes |
Fast-moving subjects, action content |
Start with follow mode as your default. It covers the widest range of shots and responds naturally to your movement. Switch to pan-follow or lock mode when you need more controlled, specific results.
How to Choose the Right Hohem Gimbal for B-Roll Work
Hohem iSteady M7: The M7 is the best all-around choice for smartphone B-roll. The built-in extension pole gives you low-angle and overhead reach without a separate accessory. The on-device AI tracking handles the tracking follow shot automatically. And the integrated fill light means you can shoot indoors without carrying a lighting kit. If you are producing content that mixes walk-and-talk with cinematic B-roll, this is the one to own.
Hohem iSteady V3 Ultra: For outdoor creators who shoot in natural light and need maximum portability, the V3 Ultra is the more practical option. The detachable remote controller lets you trigger recording from a distance, which is helpful for orbit shots and jib rises where you need to step away from the camera. The 360-degree RGB fill light adds creative flexibility for food and product content.
Hohem iSteady MT3 Pro: If you shoot B-roll on a mirrorless camera rather than a phone, the MT3 Pro brings the same cinematic shot types to a heavier rig. It supports professional camera setups with proper payload capacity, and the detachable remote with live video feed gives you remote framing control during complex shots. This is the choice for creators who need cinema-grade results.
Laat een reactie achter
Alle reacties worden gemodereerd voordat ze worden gepubliceerd.
Deze site wordt beschermd door hCaptcha en het privacybeleid en de servicevoorwaarden van hCaptcha zijn van toepassing.